Lately everybody has been discussing the advantages and disadvantages of different video-conferencing-solutions. When listening to Ben Stegink and Scott Hoag on episode 173 of the Microsoft Cloud IT Pro Podcast, I found them making a compelling point:
All these solutions (Teams, Zoom, etc.) have a different focus for different use cases. It doesn’t make sense to just pit them against each other to find the “best solution” without clearly defining the problem.
In my day to day work, I use Microsoft Teams constantly. It’s wonderful for collaboration and the enterprise capabilities (especially around security and compliance) are top notch.
However, for a quick call without any document collaboration or with people with limited technical expertise, Zoom might be the better fit. It’s dead simple to log into a meeting and the interface is super straight forward. Teams tends to have quite the steep learning curve…
And don’t get me started on Chat in Teams vs. Slack…
Anyway. I fully agree with Ben and Scott: All those services have things they do better than others and searching for the holy grail of conferencing might be a waste of time.
Zoom has been poked at quite a lot recently for security concerns but I feel like they’re handling themselves really well in this extreme situation. If you haven’t already, check out “Security Now” with Steve Gibson, in particular these two episodes are relevant to this:
Episode 761 – “Zoom go Boom”
Episode 763 – “The COVID Effect”
I heard of quite a few people leaving Zoom over those concerns and moving to Jitsi instead. Jitsi’s Service “Jitsi Meet” – like Zoom – focusses on meetings without collaboration or document sharing and on video calls above text based chat.
What’s big about Jitsi Meet is the fact, that it’s completely open source (GitHub Repo) and really focused on security and privacy.
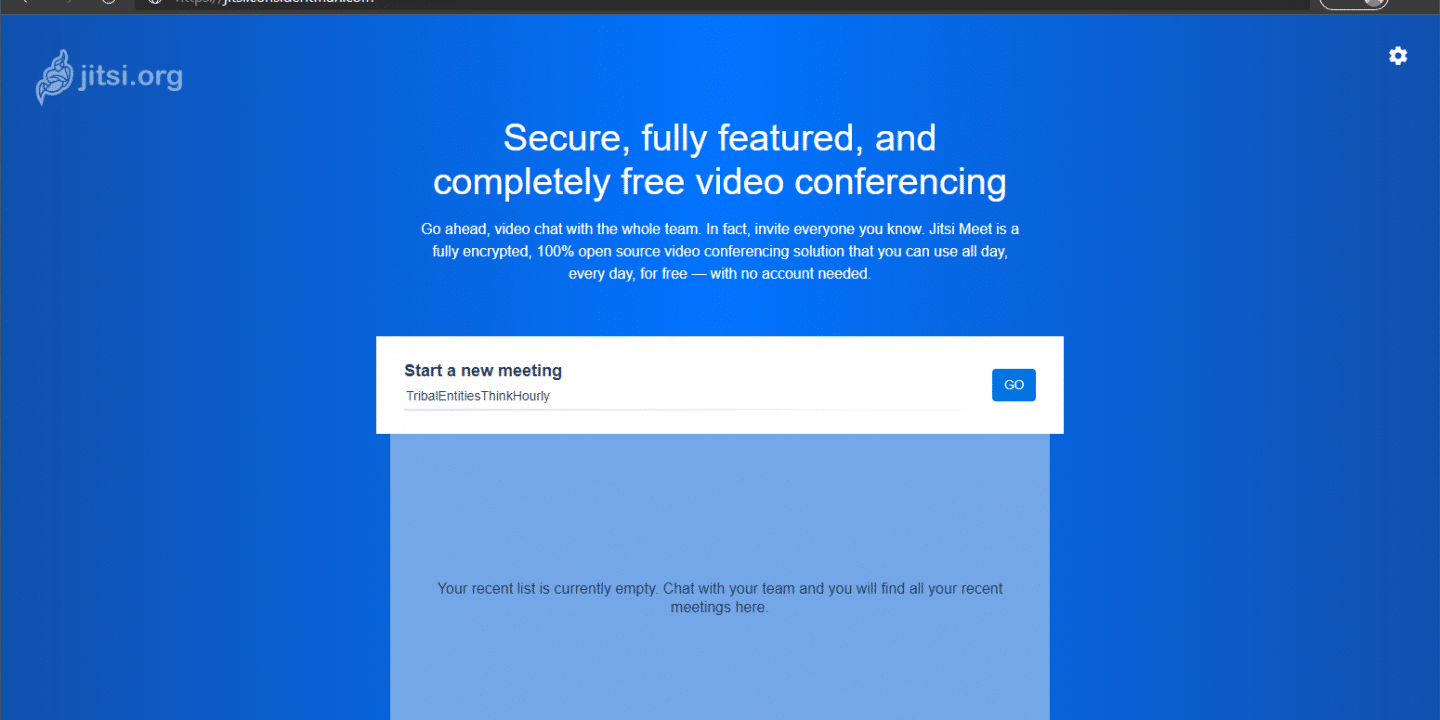
Jitsi offers a free Video Conferencing Service at https://meet.jit.si – just enter any meeting ID (or use the auto-generated one) and click start. That’s it. You can share the meeting ID with people and when they enter it, they join your meeting. Of course you can set an additional password for joining the meeting.
This is great!
✅ free service
✅ easy to use
✅ end-to-end encrypted*
* But wait! The end-to-end encryption only works in 1:1 meetings! Multiparty meetings use Jitsi Videobridge instead of the P2P mode and they are decrypted at the server!
According to Jitsi the decrypted data is never persisted to storage and handled exclusively in memory (except meeting recordings that are saved at the Jitsi server until they have been delivered to your storage), but I wanted to see what I could do on my own instance.
So I set out to install Jitsi Meet on an Azure VM
Disclaimer: Jitsi Meet runs on Linux. I’m an absolute Linux-noob, so please bear with me if I have strange stuff in here – I just followed the documentation. I’d be very happy about a comment, if you spot a mistake or see room for improvement somewhere!
Infrastructure
Requirements
Turns out, it’s virtually impossible to get proper information on the hardware requirements for Jitsi Meet. I’ve been digging through forums to get to basically the following information:
“I needs very little.”

So? Ehrm? I just decided to spin up a B2ms (2 vcpus, 8 GiB memory) for now and see how it responds to load…
OS
Out of the box, Jitsi Meet supports:
- Debian (9 or later)
- Ubuntu (18.04 or later)
The little experience with Linux I was able to make so far was with Ubuntu – so obviously I went with that (Ubuntu Server 18.04 LTS to be precise).
Server
I went through the portal for this one.

There’s not much to creating a resource group…
I’ve decided to deploy everything in West Europe.

When clicking adding a new resource, Ubuntu Server is right up there in the recommendation.
The marketplace has a lot of fancy stuff. Ubuntu Server is in spot 2 of the popular offers.

I created the VM inside the resource group, so it’s automatically selected. The VM name is the same as the name of the resource group, I don’t need redundancy for my test system. The Ubuntu Server 18.04 LTS image is the one I want and I selected “Standard B2ms” as the size. I’ve decided against a Spot instance, that’s something I want to test another time (watch this space 😉).
I’ll be describing the creation of the SSH key briefly in the “SSH key” section below.

When creating a Linux VM, port 22 is opened by default. The warning is warranted, though. SSH is a popular attack vector. I’ll be locking that further down later on.
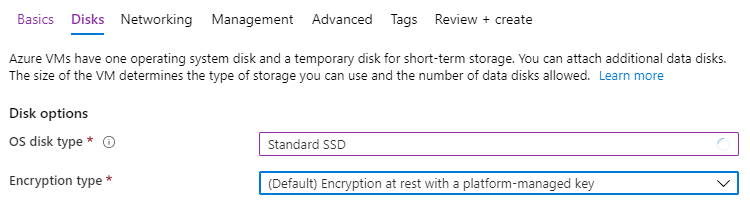
I’ve dialed the OS disk down to a Standard SSD to save a bit of money. Additional disks are not necessary since I’m not planning on persisting any data.
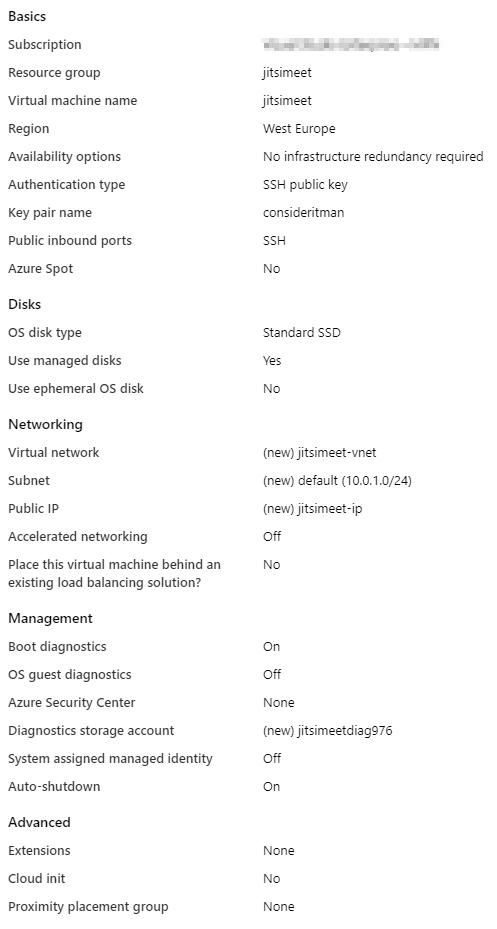
I’m leaving the rest as is. Azure creates the corresponding VNet and IP for me.
SSH key

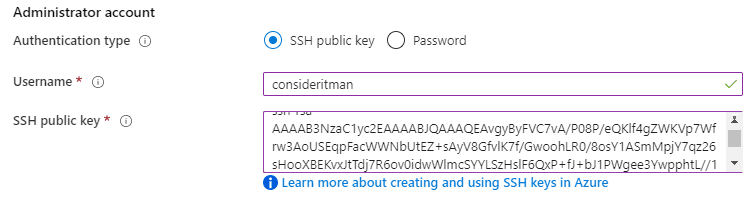
I used PuTTYgen for creating my SSH key, since it’s simple and free.
I added the VM name as a key comment and set a passphrase. The parameters (2048 bit RSA key) can be left in default. Next, I just clicked on “Generate” and what you see above is the result.
The content of the public key field on the top can be copied into the corresponding field in the Azure portal.
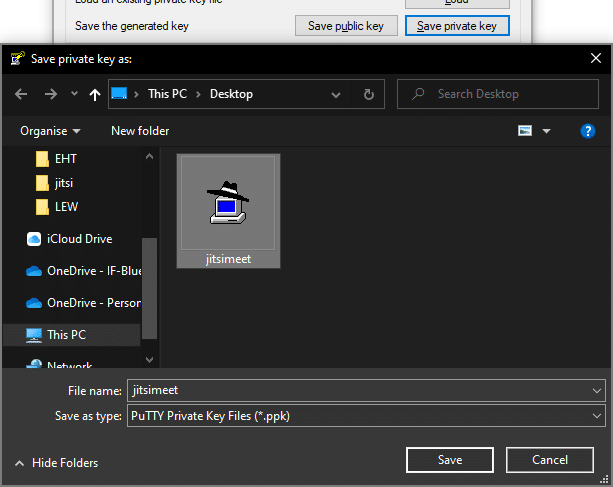
The private key file will be necessary to establish a connection to the VM later on.
Network

I’m setting a DNS Name so my server will be available under the same hostname and I don’t need a static public IP.
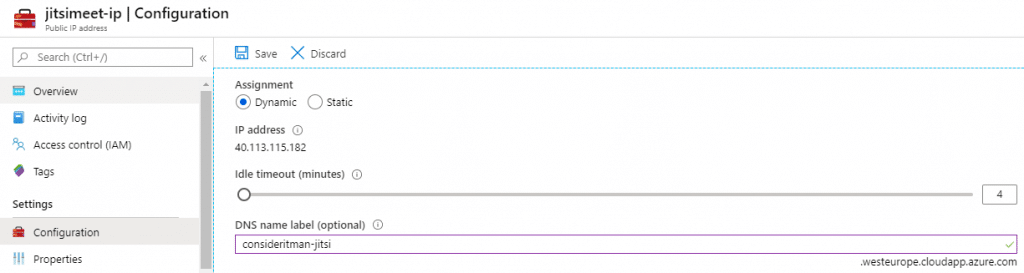
This setting allows me to access my jitsi instance at consideritman-jitsi.westeurope.cloudapp.azure.com later on.
When I created the VM, a network security group was created with default settings. You

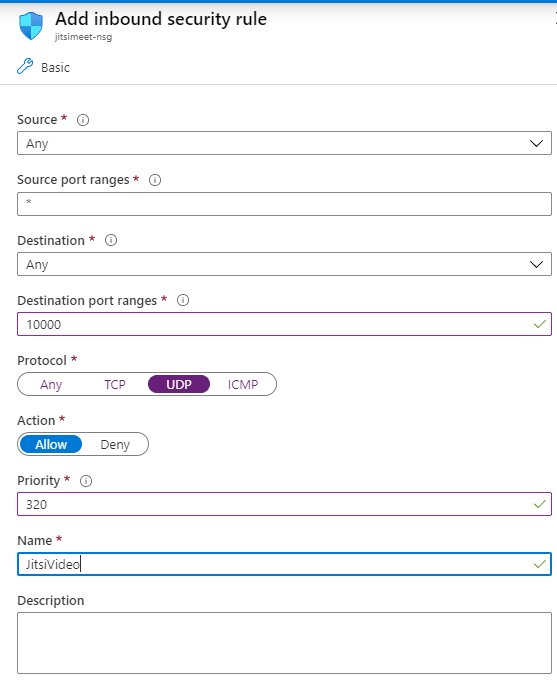
Jitsi Meet requires ports 80 and 443 to be open for TCP so it can handle the http/https part. Port 10000 has to accept UPD packets to use Jitsi Videobridge.

DNS
It turns out that Let’s Encrypt is unable to complete the http-01 challenge if I use the Azure DNS name…

I’ve created a C-Name in my domain for jitsi.consideritman.com to be redirected to my VM, that works.
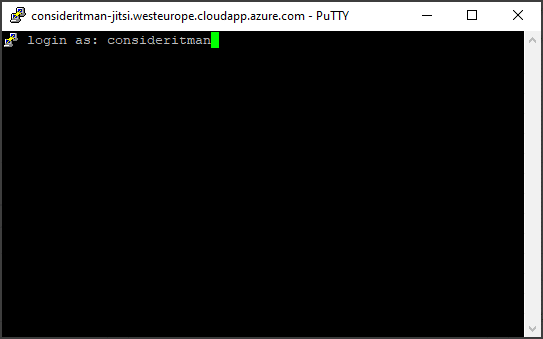
Connecting to the server
Now it’s time to take a look into the server!
I use PuTTY as my SSH client, because I find it easy to use, very customizable and stable.

In the host name field, I put the DNS name I defined earlier.
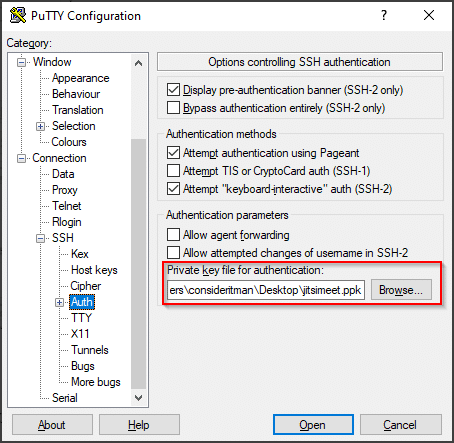
The private key for this session will be the key file I created earlier using PuTTYgen, the one that belongs to the public key, I entered during the creation of the VM.

Software
Requirements
Jitsi Meet requires either NGINX or Apache – that’s it.
Time zone
sudo timedatectl set-timezone Europe/Berlin
I set the time zone to make sure that the meetings display the correct date and time later on.
NGINX
sudo apt update
sudo apt install nginx
The documentation says that Jitsi Meet will check for NGINX first and use that and only fall back to Apache if NGINX isn’t found. So I installed NGINX.
sudo systemctl enable nginx
I made sure that NGINX started with the system so that I could simply start and stop my VM to save on uptime.
Jitsi Meet installation
sudo bash
Installing Jitsi Meet requires root access.
nano /etc/hosts
I used Nano to edit the hostfile and add the FQDN.
The first line (by default) is:
127.0.0.1 localhost
I added the URL I defined earlier as an alternative hostname like this:
127.0.0.1 localhost jitsi.consideritman.com
Close Nano with [Ctrl] + [X]
Confirm saving the changes with [Y]
Confirm overwriting the file with [Enter]
echo 'deb https://download.jitsi.org stable/' >> /etc/apt/sources.list.d/jitsi-stable.list
wget -qO -  https://download.jitsi.org/jitsi-key.gpg.key | sudo apt-key add -
The Jitsi package repository has to be added to make it available for installations.
apt-get install apt-transport-https
apt update
apt-get -y install jitsi-meet
First we enable https apt repositories then we can install Jitsi Meet.
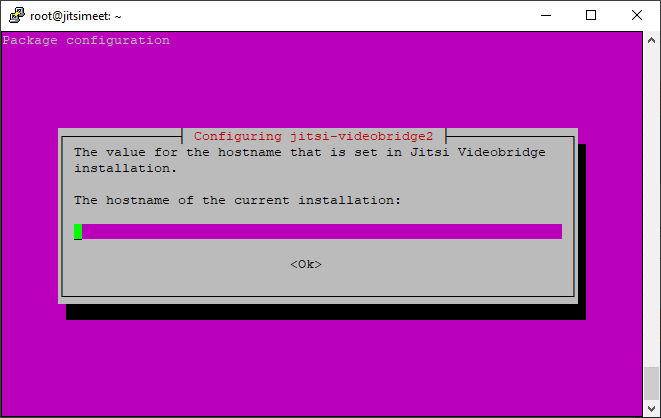
As a hostname I’m going to put jitsi.consideritman.com again.
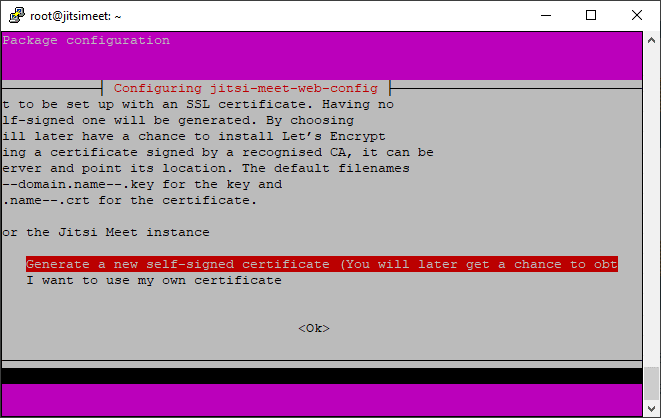
For the initial installation, I go with a self signed certificate.
Why does this matter?
The mobile app will not work with a self signed certificate!
But don’t worry, we’re going to do the old certificate switcheroo later on.
/usr/share/jitsi-meet/scripts/install-letsencrypt-cert.sh
Whoop, there it is! Jitsi comes with a simple script that will request a let’s encrypt certificate and set it up. It will also add a cron job for automatic certificate renewal, so this one is really set-and-forget. Just enter a contact email-address when prompted so that let’s encrypt could contact you if something of significance to your certificate were to happen.
Limit who can start a meeting
This step is optional – if everybody should be able to start a meeting, you can just skip it and it will work just fine. If you want to limit who can start a meeting to specific people, though:
Prosody config
sudo nano /etc/prosody/conf.avail/jitsi.consideritman.com.cfg.lua
I edited the Prosody config file of the Jitsi Confrence Focus Component in Nano. (Prosody is the XMPP server component that Jitsi Meet uses)
Please make sure to replace “jitsi.consideritman.com” with your URL, when you’re building this.
I had to replace the value for authentication in the main VirtualHost block from “anonymous” to “internal-plain”. This will ensure that creating meetings is only possible for authenticated users.
authentication = "internal_plain"
Next I added a second virtual host for the guest to ensure that joining a meeting will still be possible without an account.
VirtualHost "guest.jitsi.consideritman.com"
authentication = "anonymous"
c2s_require_encryption = false
This is what it looks like, when it’s done:
VirtualHost "jitsi.consideritman.com"
-- enabled = false -- Remove this line to enable this host
authentication = "internal_plain"
-- Properties below are modified by jitsi-meet-tokens package config
-- and authentication above is switched to "token"
--app_id="example_app_id"
--app_secret="example_app_secret"
-- Assign this host a certificate for TLS, otherwise it would use the one
-- set in the global section (if any).
-- Note that old-style SSL on port 5223 only supports one certificate, and will always
-- use the global one.
ssl = {
key = "/etc/prosody/certs/jitsi.consideritman.com.key";
certificate = "/etc/prosody/certs/jitsi.consideritman.com.crt";
}
speakerstats_component = "speakerstats.jitsi.consideritman.com.de"
conference_duration_component = "conferenceduration.jitsi.consideritman.com"
-- we need bosh
modules_enabled = {
"bosh";
"pubsub";
"ping"; -- Enable mod_ping
"speakerstats";
"turncredentials";
"conference_duration";
}
c2s_require_encryption = false
VirtualHost "guest.jitsi.consideritman.com"
authentication = "anonymous"
c2s_require_encryption = false
Component "conference.jitsi.consideritman.com" "muc"
...
On the primary virtual host (used to create meetings), we now require authentication and on the secondary virtual host (used to join meetings), we don’t.
Jitsi config
sudo nano /etc/jitsi/meet/jitsi.consideritman.com-config.js
The anonymousdomain block already exists in the configuration and needs to be commented out. I set it’s value to the guest domain I just added in the Prosody config.
anonymousdomain: 'guest.jitsi.consideritman.com'
The finished file looks like this:
/* eslint-disable no-unused-vars, no-var */
var config = {
// Connection
//
hosts: {
// XMPP domain.
domain: 'jitsi.consideritman.com',
// When using authentication, domain for guest users.
anonymousdomain: 'guest.jitsi.consideritman.com',
// Domain for authenticated users. Defaults to <domain>.
// authdomain: 'jitsi.consideritman.com',
...
Now Jitsi Meet knows what virtual host to use for guest users.
Jicofo config
sudo nano /etc/jitsi/jicofo/sip-communicator.properties
I added the authentication URL like this:
org.jitsi.jicofo.auth.URL=XMPP:jitsi.consideritman.com
This is the finished Jicofo config file:
org.jitsi.jicofo.BRIDGE_MUC=JvbBrewery@internal.auth.jitsi.consideritman.com
org.jitsi.jicofo.auth.URL=XMPP:jitsi.consideritman.com
Jicofo now knows where to go for authentication.
Housekeeping
sudo systemctl restart prosody.service
sudo systemctl restart jicofo.service
Restarting the services makes them pull their new config.
User Management
sudo prosodyctl adduser [username]@jitsi.consideritman.com
This command adds a single user. Only users you created this way will be able to start a meeting. Please replace the placeholders and the domain with the correct values.
(Use “prosodyctl passwd” to change passwords and “prosodyctl deluser” to remove users.)
That’s it!
Test
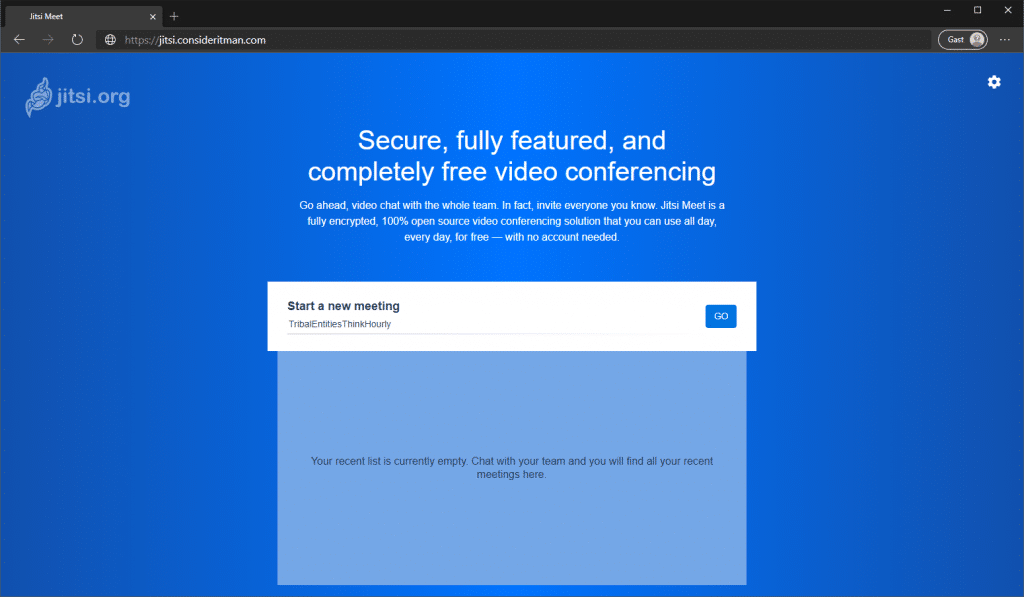
When going to my URL, I now get to the start page of Jitsi Meet where I can start or join a meeting. (The following authentication prompt is skipped if you didn’t limit who can create meetings.)


Enter the credentials of one of the users you created in Prosody before and off we go – meeting started!

You don’t need to enter the domain on login, just the username.

I started a meeting with an auto-generated ID and joined it from my iPhone (by entering the same ID) to ensure that the certificate was working as expected. To join your instance, you need to adjust the settings in the mobile app a bit.
If when you send an invitation to someone the link will work – regardless of what they have in their settings. So you don’t need to instruct everyone you want to meet with to adjust them, this is just relevant if you want to join by ID or start a meeting.

I have my phone in German, but really, the important part is still in English: The Server-URL setting needs to point towards my instance. If this is not configured, it points to the public Jitsi Meet Server.
Password protect a meeting
With the current settings, anyone with the URL and the meeting ID can join a meeting. If you want to add a layer, you can set a password for your meeting.

Clicking on the “i” in the bottom right corner of the meeting screen will allow you to add a password or copy the meeting link to easily send it to people.
Next steps
Now we wait.
I’ll test the configuration with a few people and see how the hardware holds up. My initial tests show incredibly little use, maybe I can even scale it down.
I’m closing port 22 on the network security group and only open it, when I actively need to get into the VM. There’s more elegant versions (like Just-in-time-access or Azure Bastion), but for a test system, I’m fine with that.
Also I’ve been thinking about trying to deploy Jitsi Meet using containers next – just to get acquainted with them a bit more. What do you think about that? Let me know, if you’ve tried that before and how it went!
Questions? Leave me a comment or catch me on Twitter!
Great stuff! Has anyone set up a Jitsi-server on a virtual machine under Windows? Is there a downloadable, configured VM available somewhere?